3D-Mapper
WordPress Plugin
- latest update: 02/11/2022
- by: Orange_Box
- 3d-mapper.com/
3D-Mapper WordPress plugin is the easiest way to integrate and customize 3D maps on your WordPress website.
Thank you for purchasing our plugin. If you have any questions that are beyond the scope of this help file, please feel free to email via our user page contact form here.
Getting Started
To use your 3D mapper plugin you need to follow these simple steps:
- Install the plugin in your WordPress
- Create a user account and get Access Token
- Create 3D maps
- Import your 3D maps
- Edit your 3D maps
- Add your 3D maps to your content
Let's get started!
Install the Plugin
Once you've downloaded the installation file on ThemeForest, extract it and locate a file called 3d-mapper.zip. You can install the plugin by using one of two installation methods:
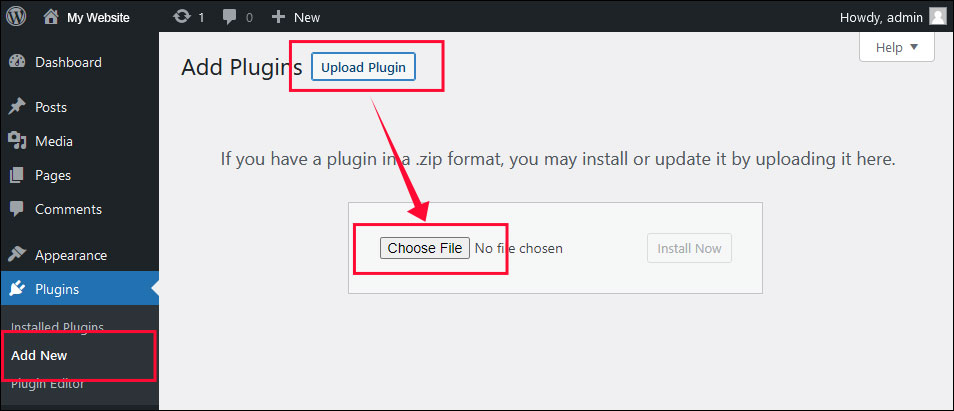
WordPress upload - This is probably the simplest way for most users. Here are the steps you need to take:
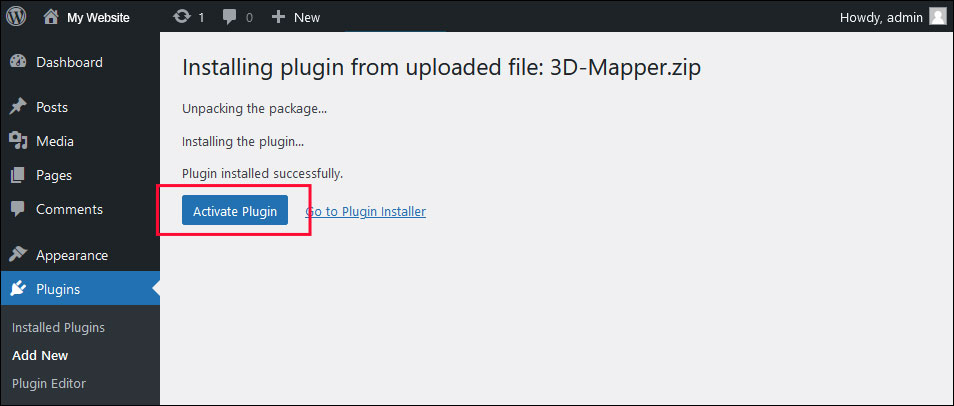
- Login to WordPress admin
- Go to admin panel > Plugins > Add New > Upload Plugin
- Click on "Choose File" and select 3d-mapper.zip
- Click on "Install Now"
- Click on "Activate"
FTP upload - If you wish to install via FTP, here are the steps you need to take:
- Using FTP client, login to the server where your WordPress website is hosted
- Using FTP client, navigate to the wp-content/plugins/directory under your WordPress website's root directory
- Using FTP client, upload the 3D-Mapper directory to plugin directory on remote server
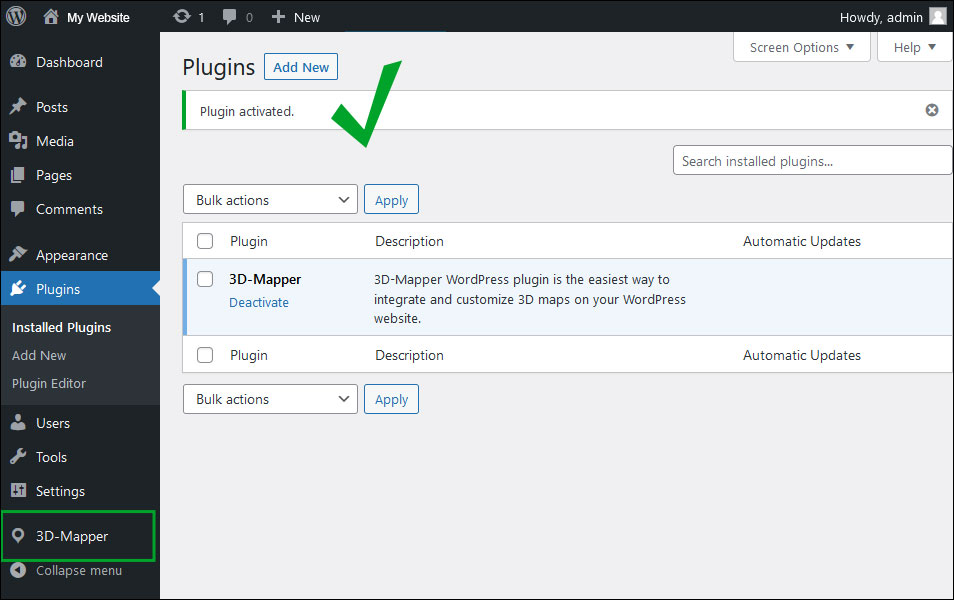
Once installation is complete, your 3D-Mapper will be ready to use by clicking the Activate button.
Register and get Access
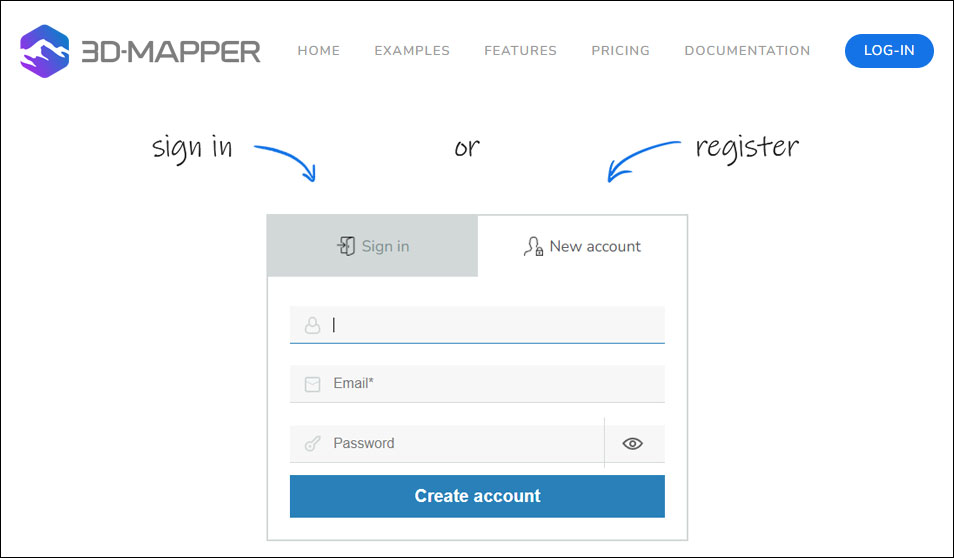
1. Go to 3d-mapper.com and create a user account or log in if you already have an account.
2. Browse to Dashboard > Your Profile
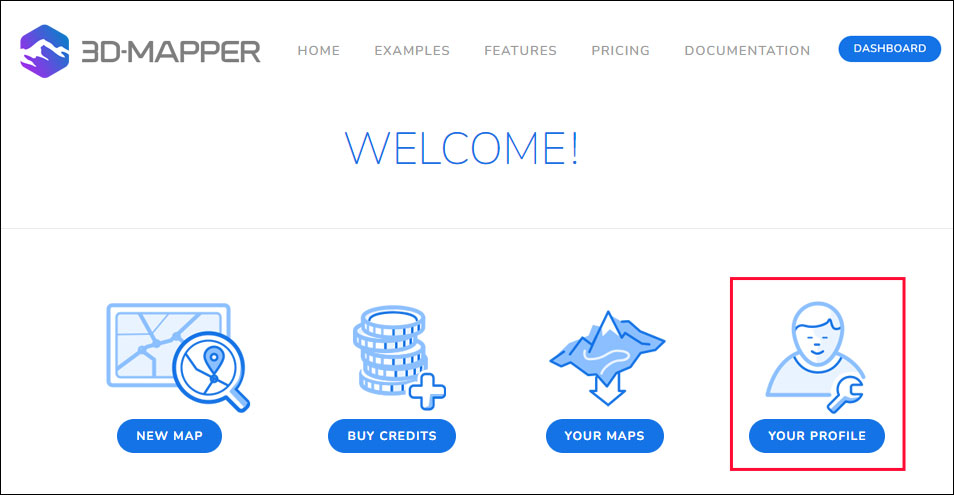
3. Copy your Access Token
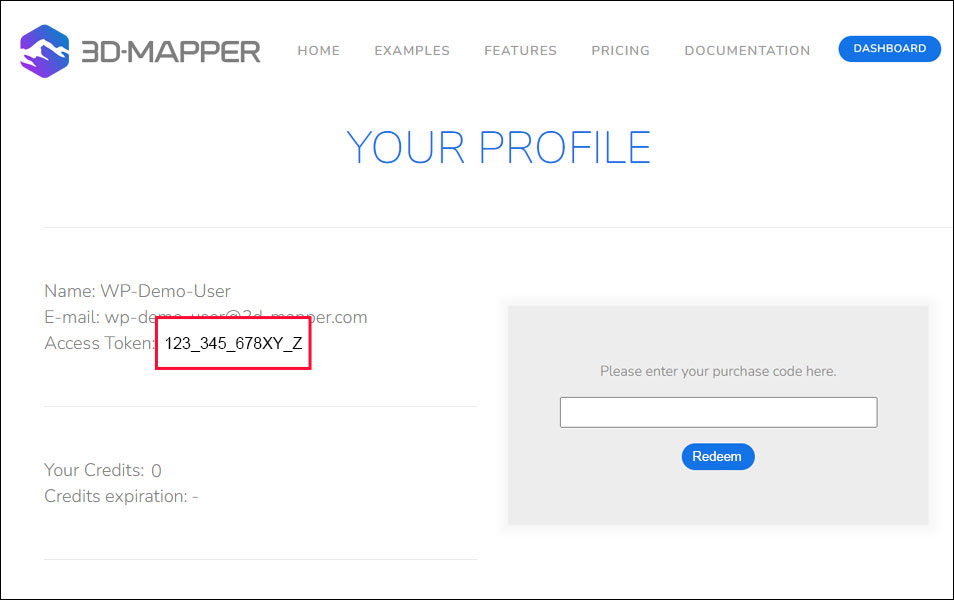
4. Go back to your WordPress > 3D-Mapper > Settings. Paste the Access Token and click "Save Changes"
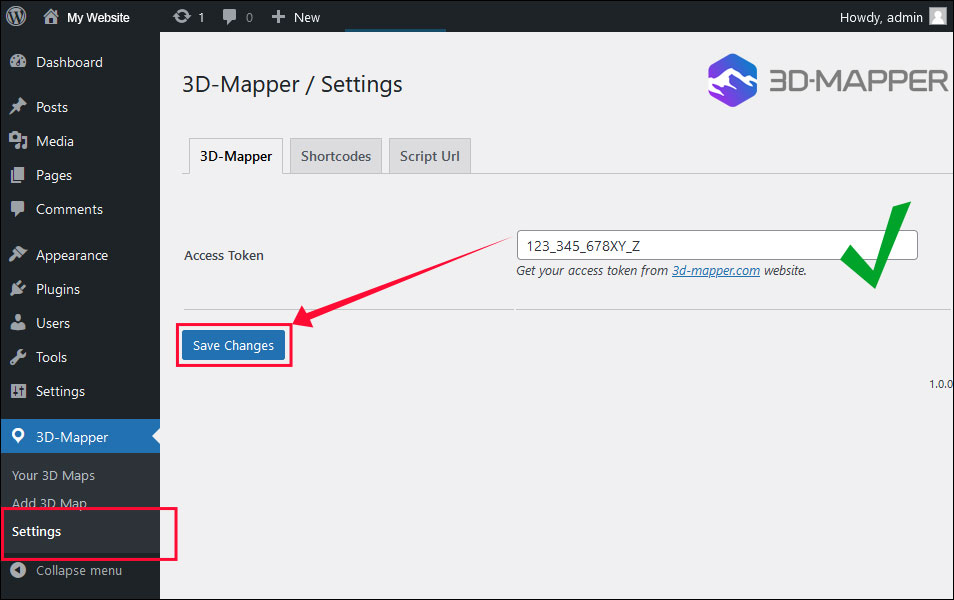
Now your Plugin is linked with your 3D-Mapper account and you can import your 3D maps with just one click.
Unlock Map Credits
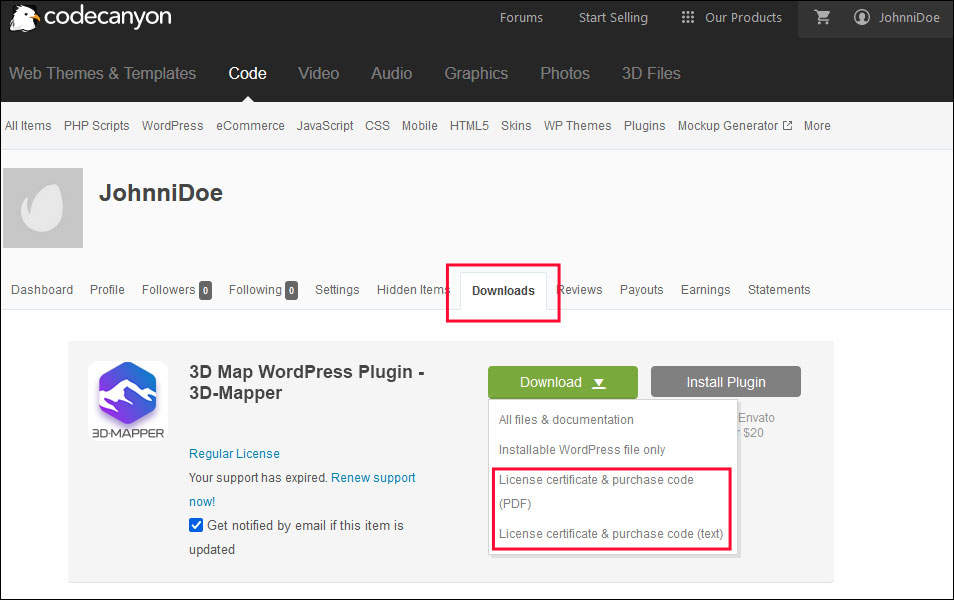
To unlock the 15 map credits that comes with your plugin, you need to enter the Envato purchase code on the 3d-mapper.com website:
- Log in to your Envato Market account and browse to Downloads.
- Click ‘License certificate & purchase code (available as PDF or text file).
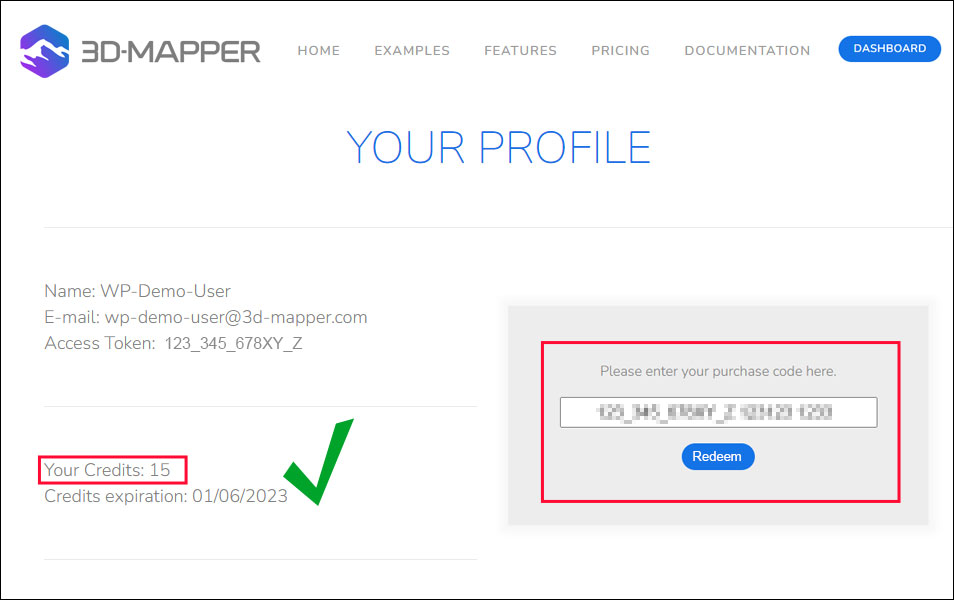
- Copy the purchase code to your 3D-Mapper.com user profile
- Click "Redeem"
- Done - now you can get 15 maps for free!
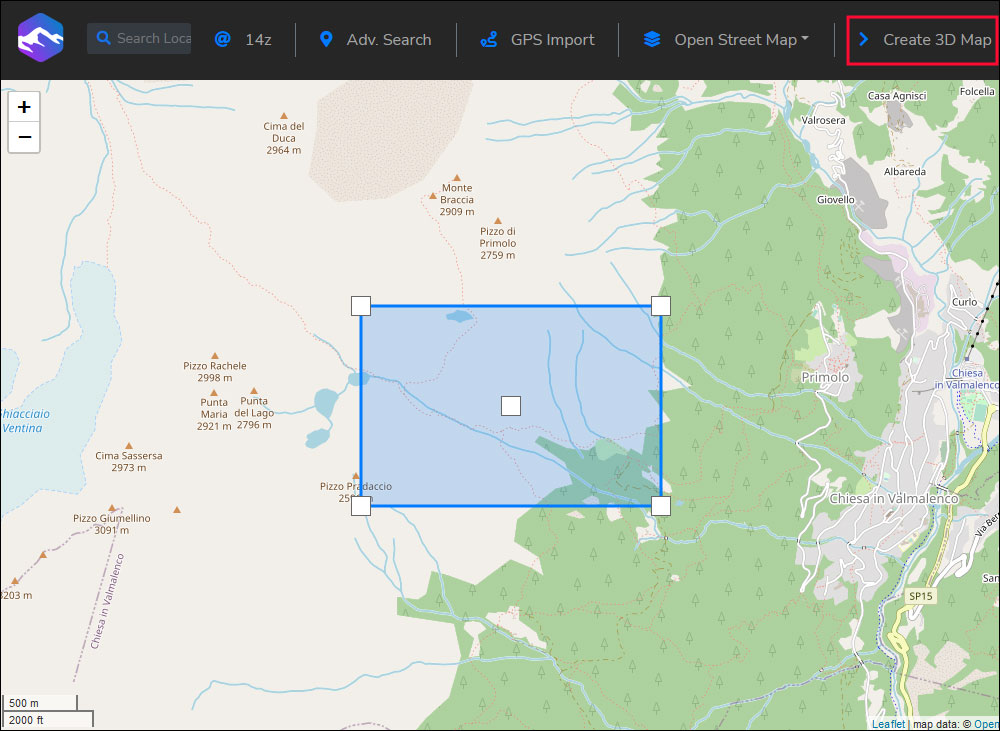
Create 3D Map
1. Register for free to use the 3D-Mapper. If you are already registered, just log in to get access to your maps and tools.
2. Open the dashboard and choose “NEW MAP”. Browse to the desired area and draw a selection rectangle. Click on “Create 3D Map” in the tool menu. Edit the map as needed.
3. Design your map as you like. To get your final map click “BUY THIS MAP” in the tool menu. (you get 15 Map Credits for free along with the plugin).
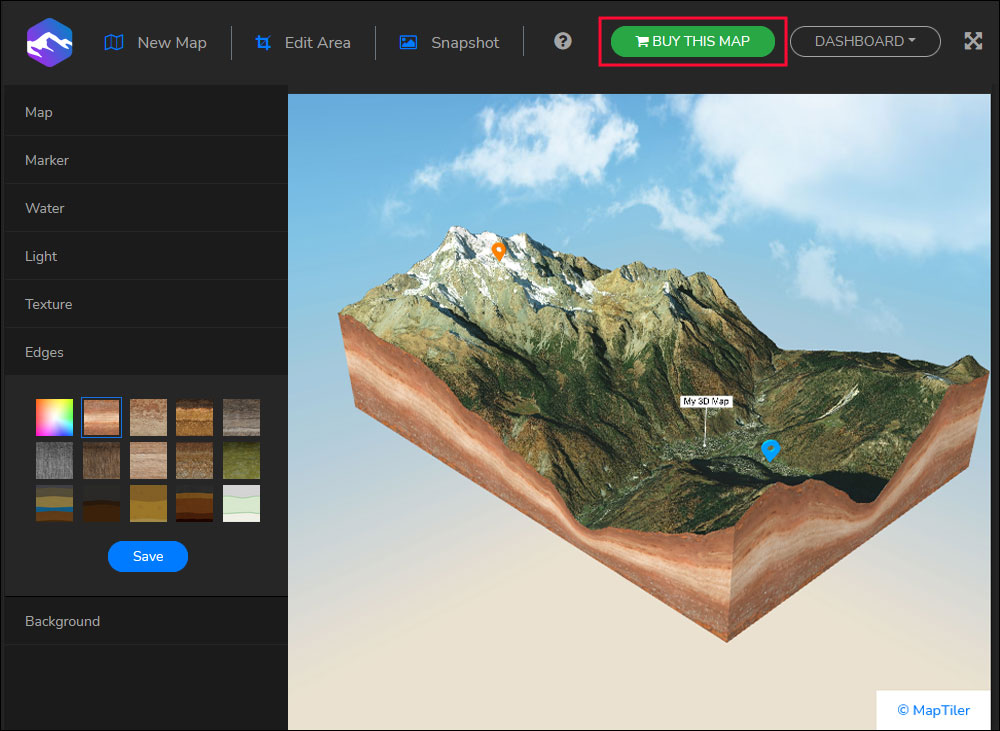
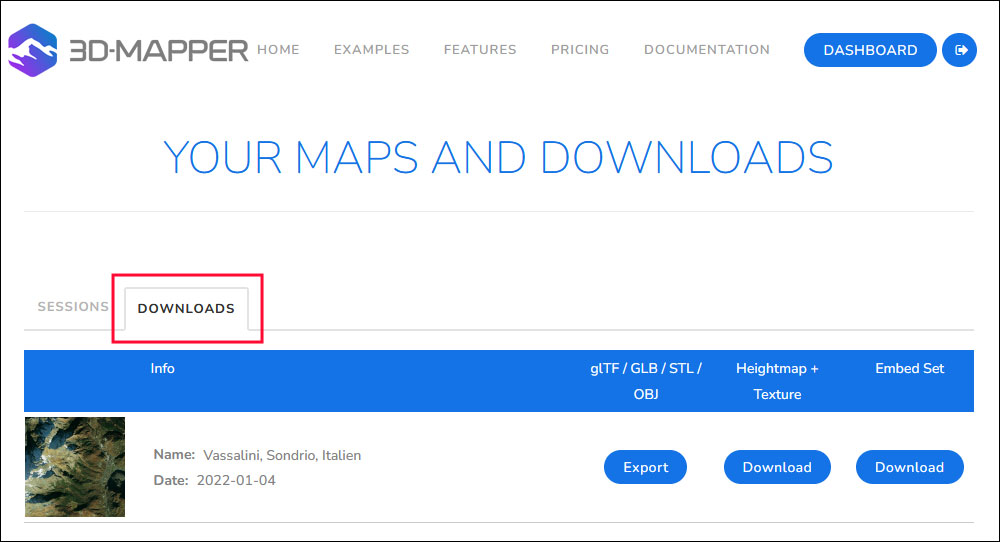
Now the map is in your "Downloads" section and you have several possibilities to use it in all of your projects.
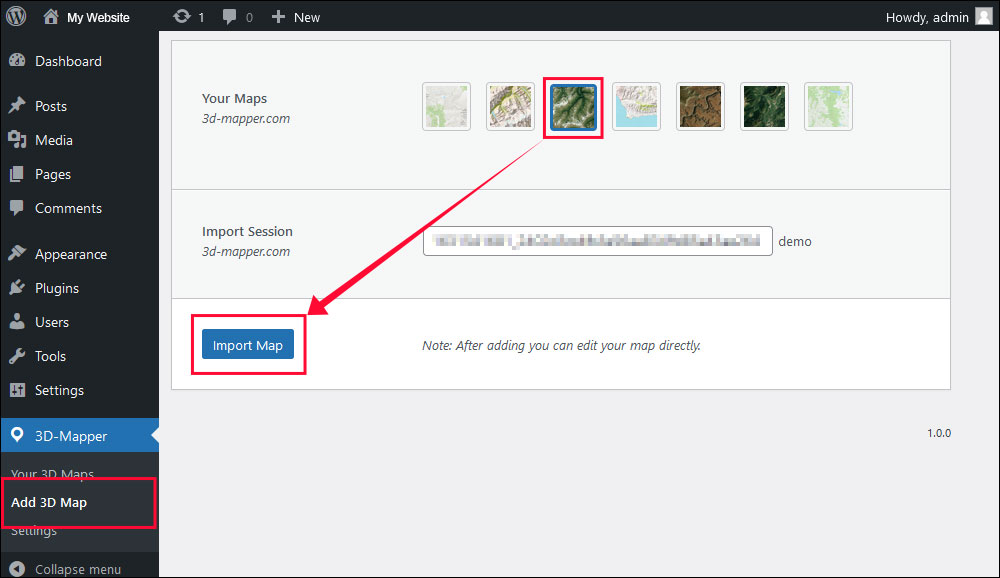
Import 3D Maps
To import your 3D map into your WordPress, go to WordPress > 3D-Mapper > Add 3D Map. Select the Map you want to import and click "Import Map"
Now you can edit the 3D map functions and determine how you want the map to appear on your website.
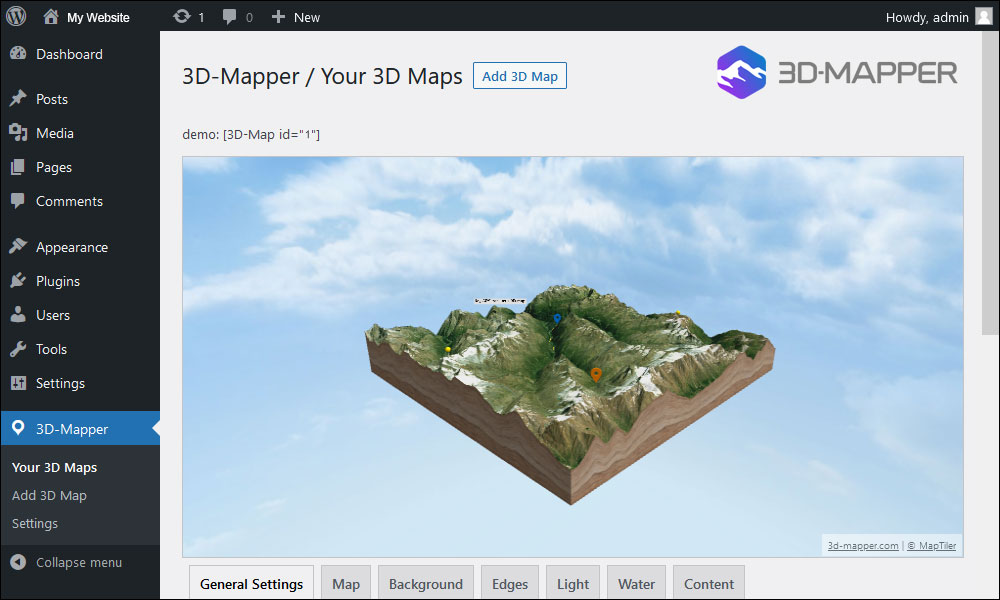
You can now find the map in the plugin list and edit it at any time.

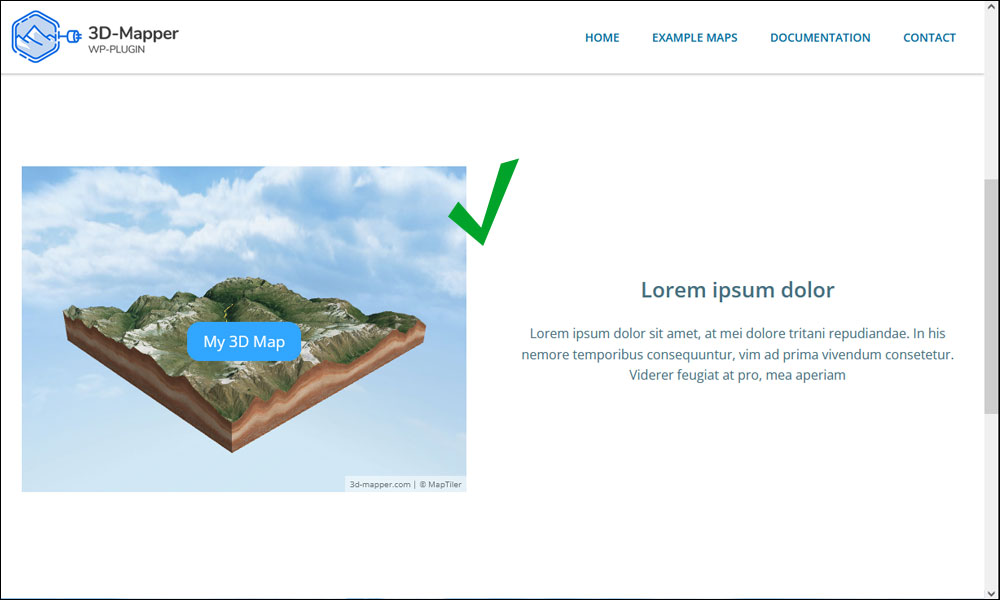
Add 3D Map into Page
To add the final 3D map on one or more pages, simply copy the map's shortcode and paste it into a text field of the desired page.

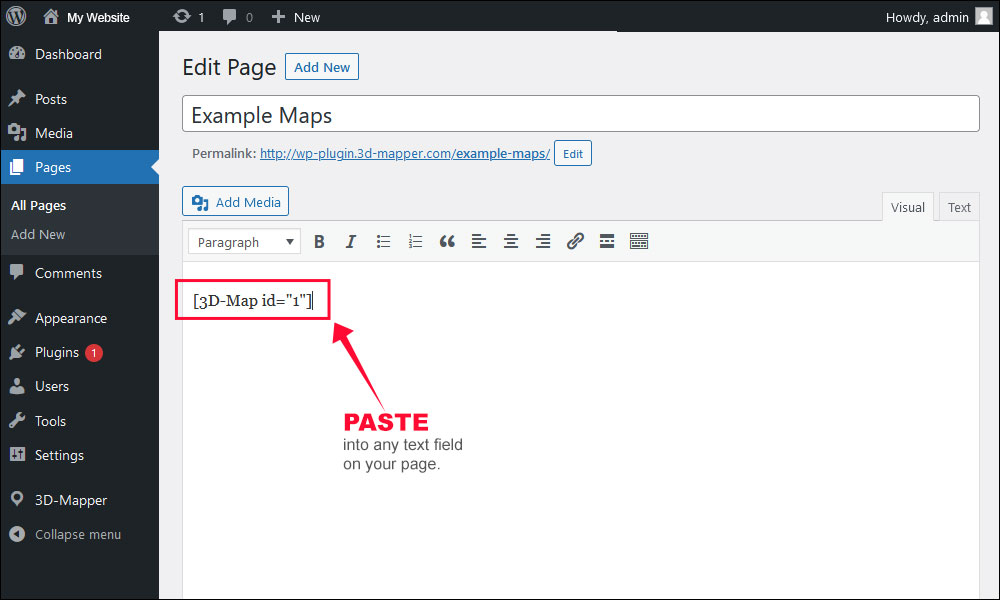
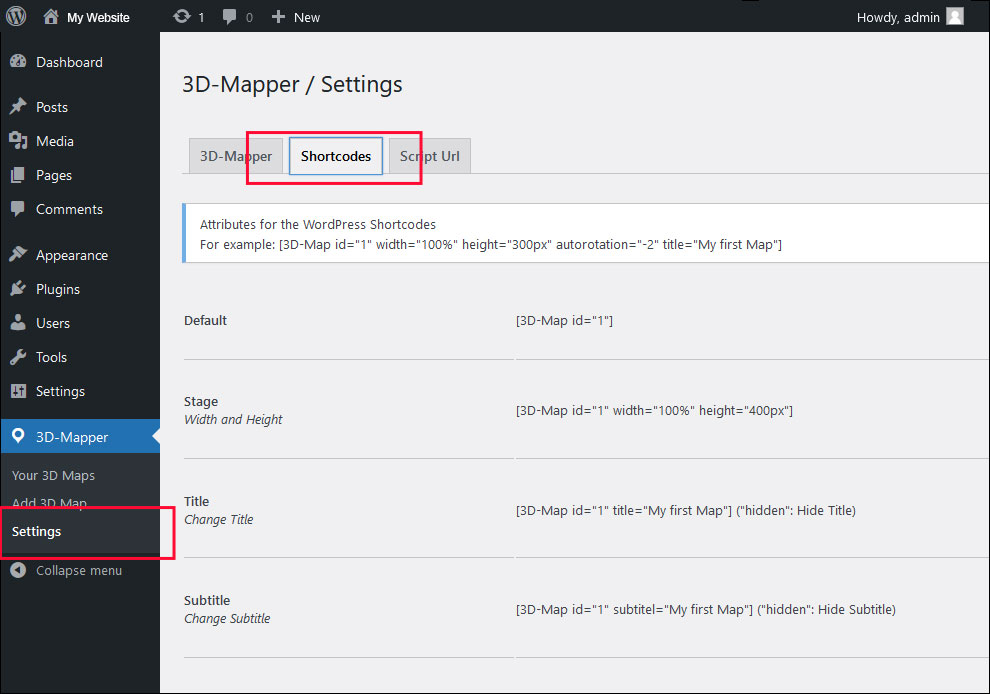
Shortcodes
Add various attributes to the shortcode from the shortcode list in order to modify properties of the map. This allows you to quickly add changes and special features that are not available in the normal editor. All attributes can be combined.
For example:
[3D-Map id="1" width="100%" height="300px" autorotation="-2" title="My first Map"]
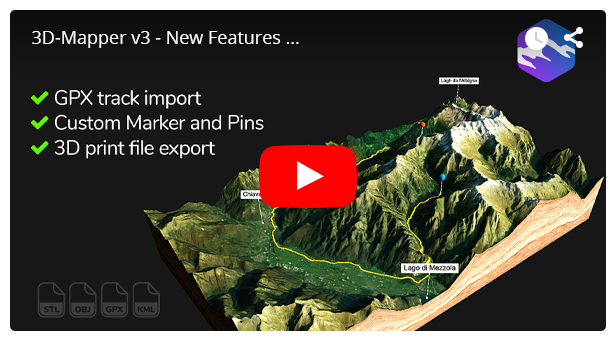
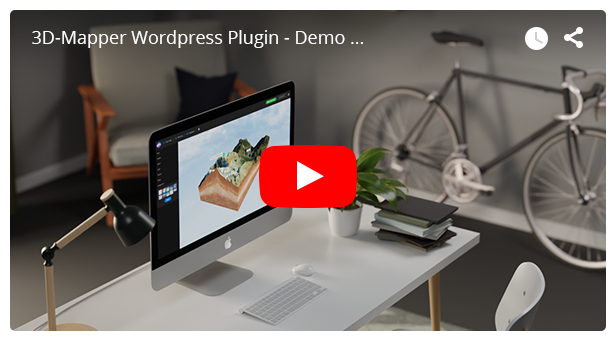
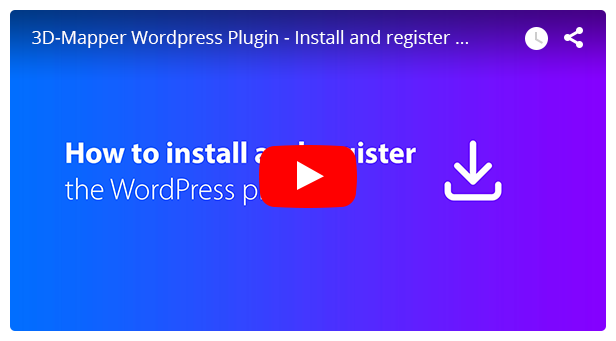
Video Tutorials
Install and register the WordPress Plugin
Create a 3D map and add it to your website
The Map Editor
1. General Settings
2. Map Settings

3. Background Settings
4. Edges Settings

5. Light Settings

6. Water Settings
7. Content Settings
3D Mapper Online Tool
Some of the 3D Mapper features you can use for your next 3D map